How to reduce PowerPoint file size

Two ways to shrink a PowerPoint deck. The first takes you into a few buried menus, works on most decks, and leaves the rest of the bloat behind. The second is one click.
Quick answer: compress images, compress embedded media, and remove unused embedded fonts. On Windows you can do some of this in PowerPoint. On Mac, or when the file still has hidden media and old template baggage, PinchDeck is the faster route.
Pick your path
Manual: Three settings across three menus. A few minutes once you’ve found them. Won’t catch hidden videos, old cropped image data, or fonts the deck inherited from templates. Steps 2 and 3 are Windows-only – Mac PowerPoint doesn’t have them.
One-click: Drag your deck into PinchDeck. It finds the bloat – hidden assets, inherited fonts, oversized media – and shows you the projected savings before you save. Ease off the compression if a video looks too soft. Same on Mac and Windows. Free for 10 exports, no account.
Reduce PowerPoint file size free →
Step 1: Compress every image at once
File → Options → Advanced → scroll to Image Size and Quality.
Tick Discard editing data. Set Default resolution to 150 ppi (96 ppi if the deck will only ever be screen-shared). Save.
PowerPoint will now downsample every image and discard cropped pixels on every save.
The trade-off: you can no longer un-crop. If you might need the original crops back later, save a separate full-quality copy first.
PinchDeck handles this in one click and lets you preview each image, so you can keep a screenshot crisp while squeezing a photo harder.
Step 2: Compress all video and audio (Windows only)
File → Info → Compress Media → pick Full HD (1080p). Wait for it to finish.
This re-encodes every embedded video at the chosen resolution. The catch: it’s destructive – the original media is replaced after save, with no preview. Work from a copy if the originals matter.
PowerPoint for Mac has no Compress Media at all. The manual Mac workaround is to extract each video, re-encode it in HandBrake, and re-insert – tedious, slow, and easy to get wrong.
PinchDeck re-encodes video on Mac and Windows, with per-video bitrate control and a side-by-side preview. It also clears out trimmed segments and video hidden behind shapes – data PowerPoint quietly keeps in the file.
Step 3: Remove unused embedded fonts (Windows only)
If your deck embeds fonts (File → Options → Save → “Embed fonts in the file”), it likely embeds fonts you don’t use. A deck inherits embedded fonts from any slide, theme, or master it was ever copied from – not just the ones currently in use. Each unused font is 1–4 MB.
PowerPoint has no built-in way to list and remove these individually. The manual workaround is to untick Embed fonts, save, then re-tick and save again. PowerPoint then only re-embeds the fonts the deck currently uses.
PowerPoint for Mac can’t embed fonts at all, so the toggle doesn’t exist – and there’s no manual cleanup route either.
PinchDeck strips out unused embedded fonts directly – on Mac too – without the untick/save/retick dance.
That’s the recipe.
PowerPoint vs other ways to shrink a deck
| Method | Best for | Main drawback |
|---|---|---|
| PowerPoint settings | Quick Windows-only cleanup | No preview and leaves hidden bloat behind |
| Online compressor | Small image-heavy decks | Requires upload and usually ignores video |
| PDF export | Static handouts | Removes video, animation, and editability |
| PinchDeck | PowerPoint files with media, fonts, and hidden weight | Desktop app instead of a built-in menu |
What the three steps miss
Even after running every step, three kinds of bloat are still in the file:
Hidden assets. Videos behind shapes, off-slide content, slides marked hidden – all still in the file at full size. PowerPoint won’t surface any of it. Walk through what these are and how to remove them in The hidden content bloating your PowerPoint.
Cropped images already in the deck. Step 1 strips cropped data on save, but only on images you re-edit. Old crops stay until you touch them.
Per-asset control. Compress Media uses one setting for every video. A 4K intro clip and a 480p screencap get the same treatment. Sometimes you want the main video crisp and the screencap tiny.
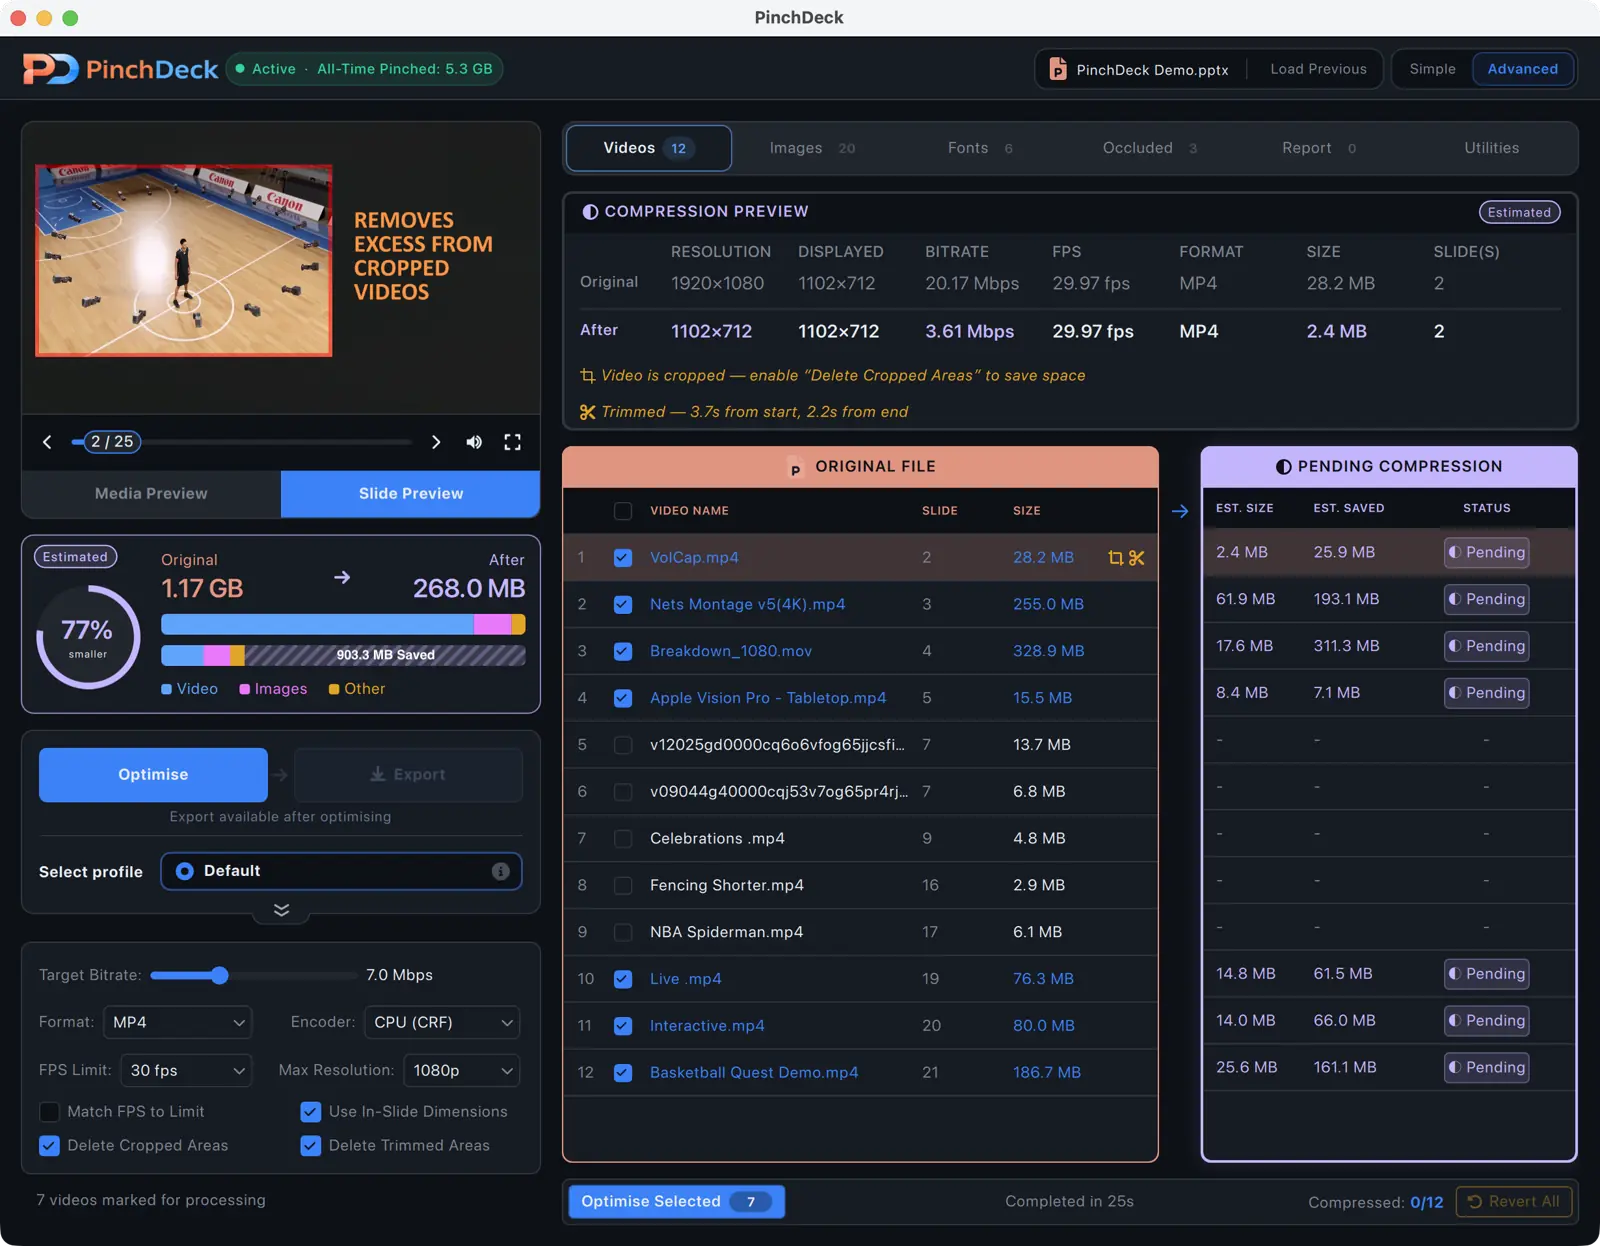
PinchDeck finds them all and shows you exactly which video, image, and font is contributing what – before anything changes.
This is the useful part to look for: the before/after estimate and the specific asset list, so you know what is making the file large before you export.
What not to bother with
Online compressors are fine for a one-off, but they have file size limits (usually 100–200 MB), require uploading slides you might not want on someone else’s server, and only handle images. They can’t touch videos in any meaningful way.
Converting to PDF kills video, animation, and editability. Fine for a board pack. Wrong for anything with motion.
Splitting the deck into multiple files is a workaround, not a fix. It creates extra work for the recipient and makes the deck easier to lose track of.
Still too big?
Worked through the recipe and the deck is still too big to share? The leftover weight is often hidden assets, oversized stock footage, or fonts the deck inherited from templates you no longer use. PowerPoint won’t show you most of it, and the three steps above won’t touch it.
That’s what PinchDeck was built for. Drop the deck in. See what’s hiding inside. Shrink it.
Free for 10 exports per device – enough to know whether it shrinks your deck before you decide to buy.
FAQ
What’s the smallest a PowerPoint file can be? A blank deck is 30 KB. A text-only 20-slide deck is 100–500 KB. Everything beyond that comes from media.
Do I really need a third-party tool for this? The manual recipe works on Windows if you’re willing to dig through PowerPoint’s menus and accept that it leaves hidden bloat behind. PinchDeck does it in one click on Mac and Windows, finds the bloat the recipe can’t reach, and shows you the result before saving.
Should I compress before or after editing? After. Compression is destructive – re-compressing already-compressed assets gives you visible quality loss. Edit at full quality, compress at the end.
Does compression change how the deck looks? At sensible settings, no. Aggressive settings show artifacts – any tool worth using lets you preview before saving.
Why doesn’t PowerPoint do this automatically? The settings above are off by default because they’re destructive. Once you turn them on, every save will compress and discard data – which is great if you’ve finished editing and bad if you haven’t.